Search

Using the TomTom Maps SDK for Web with ASP.NET Core, Part 1

TomTom Maps SDK is a set of libraries that offer robust and comprehensive location services, including maps, search, routing, traffic, and geofencing. TomTom Maps SDKs are available for different platforms—Android, iOS, and Web.

But can we put TomTom Maps SDK for Web to work with a popular web framework, such as ASP.NET Core? The answer is yes. This article will discuss how you can integrate TomTom SDK with an MVC project and a Web API service by injecting data into your map from your server-side code, and requesting server data from the client side.

TomTom Maps SDK for Web is a JavaScript library that can produce maps in a standalone HTML page or inside a sophisticated web framework, such as ASP.NET Core. Let’s see how this is done by developing a new Model-View-Controller (MVC) web app. We’ll also develop the HTML code as our view.

Setting Up an ASP.Net Core Project

The example project here requires Visual Studio 2019 16.4 or later with the ASP.NET and web development workload and .NET Core 3.1 SDK or later. Visual Studio Community 2019 is fine for this project.

You’ll also need to register as a developer on the TomTom Developer Portal and get an API key.

Next, create a new web app project in Visual Studio using these settings:

  • Select ASP.NET Core Web Application.
  • Name the project TomTomWeb to keep the same namespace as in our demo app.
  • Select Web Application (Model-View-Controller) — make sure you select the ASP.NET Core 3.1 version.

Visual Studio uses the default template for the MVC project you just created.

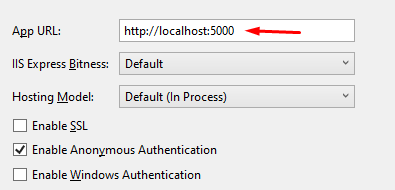
Now, right-click the project name and assign port 5000 to the App URL:

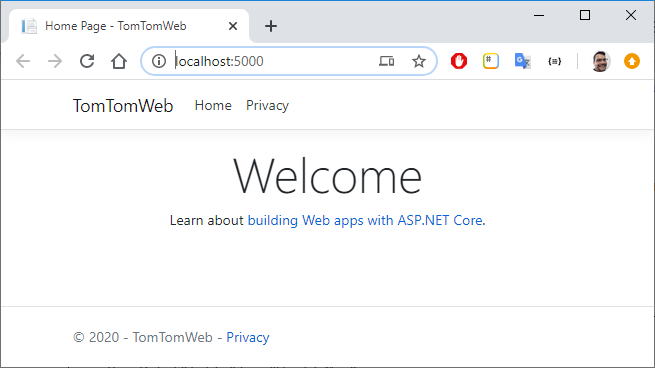
Now press F5 to run the web app:

Next we’ll install the TomTom client libraries locally.

Go to Solution Explorer, right-click the project name and choose Add > Client-Side Library. When the dialog appears, select the unpkg library provider, type “tomtom” in the Library textbox, and choose the @tomtom-international/web-sdk-maps library:

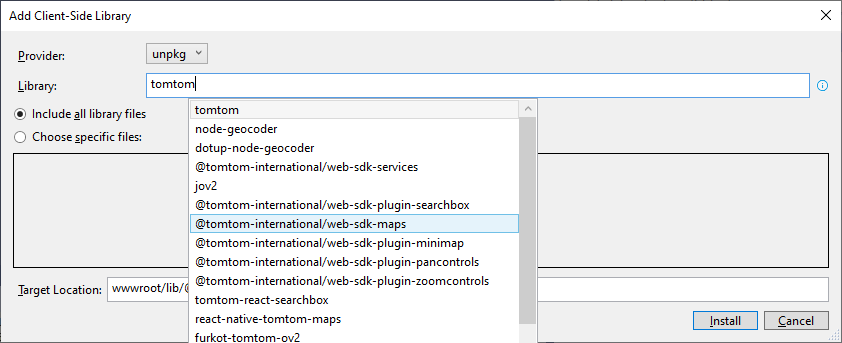
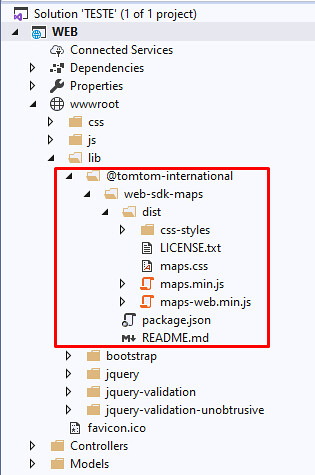
After the installation, you’ll see that the TomTom @tomtom-international/web-sdk-maps package has been installed as a client library:

Now it’s time to add a reference to this client library. You can do this by modifying the MVC view directly, or by changing the _Layout.cshtml file to include references to map.css and maps-web.min.js:

				
					...

    <link rel="stylesheet" href="~/css/site.css" />

    <link href="~/lib/@@tomtom-international/web-sdk-maps/dist/maps.css" 

        rel="stylesheet" />

</head>

...

    <script src="~/lib/jquery/dist/jquery.min.js"></script>

    <script src="~/lib/bootstrap/dist/js/bootstrap.bundle.min.js"></script>

    <script src="~/js/site.js" asp-append-version="true"></script>    

    <script 

        src="~/lib/@@tomtom-international/web-sdk-maps/dist/maps-web.min.js">

    </script>

    @RenderSection("Scripts", required: false)

</body>

</html>


Application security is beyond the scope of this article and isn’t required for our demo app, but you will need to secure your ASP.NET Core web apps in the real world.

The Client-Side: TomTom Maps SDK for Web

The previous section showed how it is easy to plug TomTom Maps SDK right into a website. With the SDK, you can incorporate maps, routes, geocoding, and other location services without having to call individual API services.

ASP.NET Core, on the other hand, is a server-side framework that dynamically generates HTML. Dynamic content generation allows us to populate the view’s HTML with server-side data.

In most web applications, server-side data comes from some form of database storage. In this demo app, however, we’re going to work with a static JSON file for the sake of simplicity. This way, we won’t need to configure and connect to a database, keeping the focus on the mapping features.

In the ASP.NET Core web application we just created, let’s replace the contents of the Index.cshtml with this code:

				
					@{ ViewData["Title"] = "World Map"; }

<style>

    #map {

        height: 500px;

        width: 1200px;

    }

</style>

<div id='map' class='map'></div>

@section Scripts {

    <script>

        let map;

        map = tt.map({

            key: 'MY_TOMTOM_KEY',

            container: 'map',

            zoom: 1.5,

            center: [0, 40],

            style: 'tomtom://vector/1/basic-main'

        });

    </script>

}


This code includes the HTML markup for displaying the map (<div id=’map’ class=’map’></div>) and the JavaScript to configure and render the map itself (map = tt.map({…});). Before you run the web app, use your own API key for MY_TOMTOM_KEY.

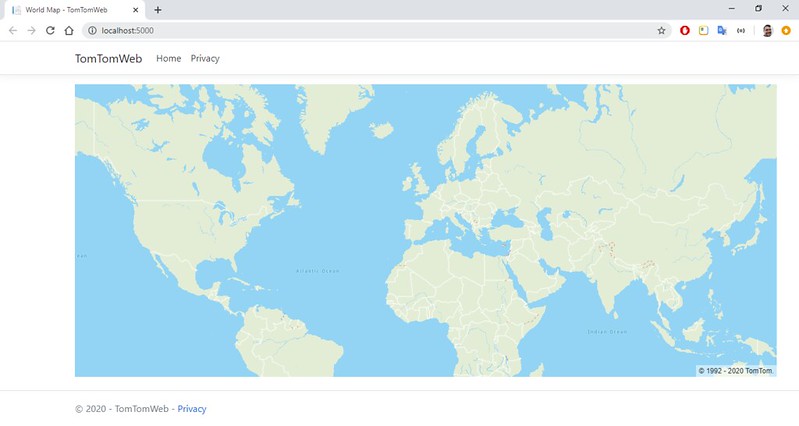
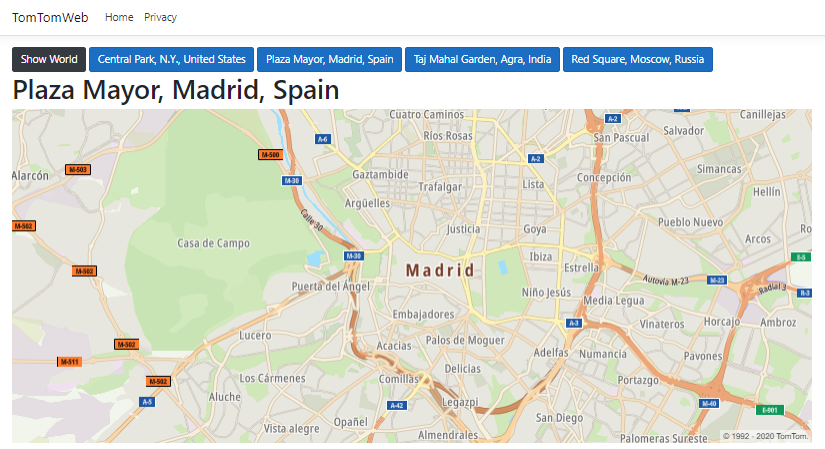
Now when you run the application you’ll see the map.

Injecting Data from Server-Side into HTML

Of course, you don’t want to hard-code your TomTom API key in your JavaScript code. That’s why we’ll pass that key as a ViewData entry in the HomeController class:

				
					public class HomeController : Controller

{

    private readonly ILogger<HomeController> _logger;

    private const string MyTomTomKey = "MY_TOMTOM_KEY";

    public HomeController(ILogger<HomeController> logger)

    {

        _logger = logger;

    }

    public IActionResult Index()

    {

        ViewData["MyTomTomKey"] = MyTomTomKey;

        return View();

    }


Now we’ll add a hidden field to store the key rendered server-side. Notice how our key value is combined with HTML code. This rendering is done by the Razor engine that comes with the ASP.NET Core installation.

				
					<input id="myTomTomKey" type="hidden" value="@ViewData["MyTomTomKey"]" />


We can use jQuery to get the TomTom API key value and provide it to the map() function:

				
					let myTomTomKey = $('#myTomTomKey').val();

map = tt.map({

  key: myTomTomKey, ...


Next, we want to place some markers on the World map. Each marker represents a famous place. Declare the JavaScript array before the map initialization:

				
					let famousPlaces = [

    {

        "id": 1,

        "name": "Central Park, N.Y., United States",

        "center": [-73.9712, 40.7831]

    },

    {

        "id": 2,

        "name": "Plaza Mayor, Madrid, Spain",

        "center": [-3.7074, 40.4155]

    },

    {

        "id": 3,

        "name": "Taj Mahal Garden, Agra, India",

        "center": [78.0421, 27.1732]

    },

    {

        "id": 4,

        "name": "Red Square, Moscow, Russia",

        "center": [37.61970, 55.75432]

    }

];


Now we’ll iterate through the famous places array to create the markers on the map:

				
					for (var i = 0; i < famousPlaces.length; i++) {

      let place = famousPlaces[i];

      var marker = new tt.Marker().setLngLat(place.center).addTo(map);

      var popupOffsets = {

            bottom: [0, -40]

      }

      var popup = new tt.Popup({ offset: popupOffsets }).setHTML(place.name);

      marker.setPopup(popup);

}


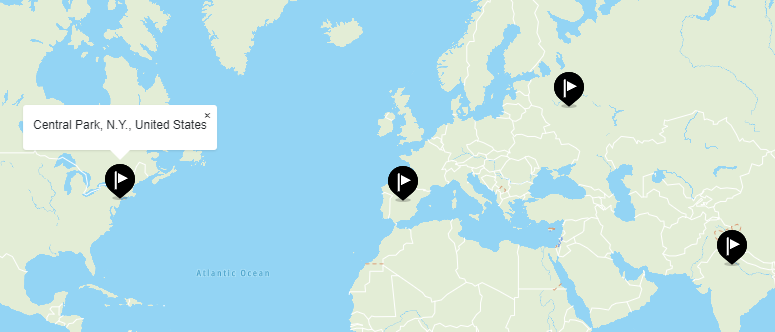
Note that each marker has a popup, which will be displayed when the marker is clicked:

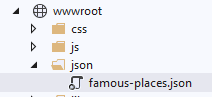
Just as with the TomTom API key, you shouldn’t hard-code the famous places data in JavaScript code. Let’s create a folder named json and add a new famous-places.json file:

				
					{

  "Places": [

    {

      "id": 1,

      "name": "Central Park, N.Y., United States",

      "center": [ -73.9712, 40.7831 ]

    },

    {

      "id": 2,

      "name": "Plaza Mayor, Madrid, Spain",

      "center": [ -3.7074, 40.4155 ]

    },

    {

      "id": 3,

      "name": "Taj Mahal Garden, Agra, India",

      "center": [ 78.0421, 27.1732 ]

    },

    {

      "id": 4,

      "name": "Red Square, Moscow, Russia",

      "center": [ 37.61970, 55.75432 ]

    }

  ]

}


Now we’ll read this JSON file from the HomeController and pass it as a model to our view:

				
					public async Task<IActionResult> IndexAsync()

{

    ViewData["MyTomTomKey"] = MyTomTomKey;

    var model = await GetPlaceCollection();

    return View("Index", model);

}

private async Task<string> GetPlaceCollection()

{

    var file = Path.Combine(Directory.GetCurrentDirectory(),

        "wwwroot", "json", "famous-places.json");

    return await System.IO.File.ReadAllTextAsync(file);

}


Since the Razor view engine requires a typed model, we declare it as string:

				
					@model string;


Once again, we create a new hidden field, but this time it will store the JSON contents rendered from the server side by the Razor view engine:

Lorem ipsum dolor sit amet, consectetur adipiscing elit. Ut elit tellus, luctus nec ullamcorper mattis, pulvinar dapibus leo.

				
					<input id="myTomTomKey" type="hidden" value="@ViewData["MyTomTomKey"]" />

<input id="famousPlaces" type="hidden" value="@Model" />


Now, using jQuery syntax, replace the famousPlaces variable initialization with the value of the hidden field:

				
					let famousPlaces = JSON.parse($('#famousPlaces').val()).Places;


Running the web app again, we see it still works just like before:

Note that our model is just a simple string. Let’s create a proper C# model class, structured according to the JSON contents:

				
					namespace TomTomWeb.Models

{

    public class PlaceCollection

    {

        public Place[] Places { get; set; }

    }

    public class Place

    {

        public int Id { get; set; }

        public string Name { get; set; }

        public double[] Center { get; set; }

    }

}


These classes can be used to pass the places data back and forth, from server side to client side, from C# to string, and then to JSON format, and vice versa, in a process called serialization.

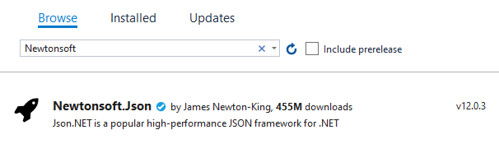
In .NET, we often use the popular Newtonsoft.Json library to serialize and deserialize data. Let’s import this library via NuGet packages.

Select the web project name on the Solution Explorer window, then right-click the Manage NuGet Packages menu item and type “Newtonsoft” in the search box. Then install the package:

Now, back to our model classes.

We can create some methods to help us with serializing and deserializing objects:

				
					using Newtonsoft.Json;

namespace TomTomWeb.Models

{

    public class PlaceCollection

    {

        public Place[] Places { get; set; }

        public static PlaceCollection FromJson(string json) => 

            JsonConvert.DeserializeObject<PlaceCollection>(json);

        public string ToJson() => 

            JsonConvert.SerializeObject(this);

    }

    public class Place

    {

        public int id { get; set; }

        public string name { get; set; }

        public double[] center { get; set; }

        public static Place FromJson(string json) =>

            JsonConvert.DeserializeObject<Place>(json);

        public string ToJson() =>

            JsonConvert.SerializeObject(this);

    }

}


We need to modify the GetPlaceCollection() method to serialize with the new PlaceCollection and Placeobjects:

				
					private async Task<PlaceCollection> GetPlaceCollection()

{

    var file = Path.Combine(Directory.GetCurrentDirectory(),

        "wwwroot", "json", "famous-places.json");

    return JsonConvert

        .DeserializeObject<PlaceCollection>

        (await System.IO.File.ReadAllTextAsync(file));

}


Next, we change the model type in our view:

				
					@model PlaceCollection;


And change the hidden field to invoke the PlaceCollection.ToJson() method:

				
					<input id="famousPlaces" type="hidden" value="@Model.ToJson()" />


Now, let’s render buttons in our view, one for each place:

				
					<div id="places-container">

    <a class="btn btn-dark" href="#" role="button" onclick="javascript: showWorld();">Show World</a>

    @for (int i = 0; i < Model.Places.Length; i++)

    {

        var place = Model.Places[i];

            <a class="btn btn-primary" href="#" role="button" onclick="javascript: showPlace(@i);">@place.name</a>

    }

</div>

<h1 id="placeName"></h1>

<div id='map' class='map'></div>


When the user clicks each button, the map will be redrawn centered at that place. But we still have to implement three JavaScript functions to make it work: the initialize(), the showWorld(), and the showPlace() methods. The initialize() method ensures we only set up and create the map instance once in our app’s lifetime. The showWorld() will then call map.jumpTo to reposition and centralize the map according to the given coordinates. Let’s create the initialize and the showWorld functions and invoke them when the app starts:

				
					initialize();

showWorld();

function initialize() {

    map = tt.map({

        key: myTomTomKey,

        container: 'map',

        style: 'tomtom://vector/1/basic-main'

    });

    for (var i = 0; i < famousPlaces.length; i++) {

       ...

    }

}

function showWorld() {

    $('#placeName').html('');

    map.jumpTo({

        zoom: 1.5,

        center: [0, 40]

    });

}


And now we add the showPlace() method to jump to the selected location and zoom in:

				
					function showPlace(i) {

    let place = famousPlaces[i];

    $('#placeName').html(place.name);

    map.jumpTo({

        zoom: 12,

        center: place.center

    });

}


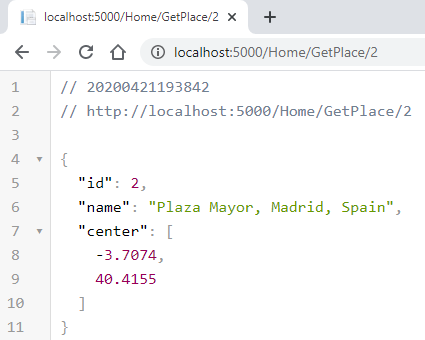
Let’s modify the HomeController class to include a new endpoint named GetPlace(). This method will return details on the place when requested by the client JavaScript code:

				
					public async Task<Place> GetPlace(int id)

{

    var collection = await GetPlaceCollection();

    return collection.Places.Where(p => p.id == id).Single();

}


When we run the web app, we can test the new /GetPlace endpoint we just created:

				
					<a class="btn btn-primary" href="#" role="button" onclick="javascript: showPlace(@place.id);">@place.name</a>


We’ll then refactor the showPlace() function to make an additional request to the HomeController and get the selected place data:

				
					function showPlace(id) {

    $.ajax('http://localhost:5000/Home/GetPlace/' + id)

        .done(function (place) {

            $('#placeName').html(place.name);

            map.jumpTo({

                zoom: 12,

                center: place.center

            });

        });

}


Wrapping Up

Creating and running a simple mapping solution from scratch with TomTom and ASP.NET Core is straightforward. We’ve seen how easy it is to install TomTom Client-Side Library packages using a Visual Studio. You just need to sign up for a free account in TomTom Developer Portal and obtain a TomTom developer key before running your solution.

Being a JavaScript library, TomTom Maps SDK for Web is easily pluggable into websites. As we’ve demonstrated, starting from a stripped-down map() function, developers can gradually improve their maps, for instance, by adding markers to given locations. Since dynamic and interactive solutions demand mapping information coming from the server, you can implement powerful ASP.NET Core controllers to both inject data into HTML and serve JSON data to client-side AJAX requests.

In the next article, we’ll dive into more sophisticated client-side mapping functions to draw rectangular areas around famous places that are easily recognizable in the map as we zoom in. We’ll also discuss how to refactor the solution and migrate the mapping data services to a new ASP.NET Core Web API project.

This article was originally posted on TomTom’s blog.

If you’re interested in developing expert technical content that performs, let’s have a conversation today.

Facebook
Twitter
LinkedIn
Reddit
Email

POST INFORMATION

If you work in a tech space and aren’t sure if we cover you, hit the button below to get in touch with us. Tell us a little about your content goals or your project, and we’ll reach back within 2 business days. 

Share via
Copy link
Powered by Social Snap