Many enterprises spent millions of dollars developing what have become legacy ASP.NET applications. They can’t afford to abandon them. But porting the code to ASP.NET Core, the only web framework Microsoft will continue developing and supporting, requires a substantial rewrite.
As a result, many enterprises with .NET teams have started building new functionality in an ASP.NET Core app while leaving old functionality “as-is” in the existing ASP.NET app. This approach works but requires quick, seamless data sharing between both applications. This requirement is because end users may have some of their requests served by the legacy ASP.NET app and others handled by the new ASP.NET Core app.
In this scenario, teams using .NET typically reach for SQL Server or Redis. Let’s see how to do it with Hazelcast instead. Hazelcast is a faster alternative compared to SQL Server and Redis. As an open-source in-memory data grid, Hazelcast provides applications with superior performance at RAM speed and extremely low latency.
Let’s dive in and explore how to use Hazelcast to solve a real pain point for many .NET teams — the gradual migration of web applications from legacy .NET web frameworks to ASP.NET Core. We’ll build a sample grocery shopping app on both platforms, using the Hazelcast in-memory data grid to handle data, then explore how the two app versions work together. You should be familiar with C# to follow along.
System Requirements
Before proceeding, verify that you have these items installed on your development machine:
- A running Hazelcast cluster. If you haven’t yet, visit the Get Started with Hazelcast page and follow the instructions to install and run a Hazelcast cluster.
- Visual Studio 2019 Community Edition or superior.
- .NET 5 SDK and .NET Framework 4.8 Dev Pack.
You can walk through the tutorial below to create .NET code from scratch. Or, you can download the completed code from this GitHub repository and follow the article.
Creating the .NET Standard Model Project
This section guides you through creating a data model built with the .NET Standard class library. We share it with a legacy ASP.NET Web Forms web app powered by a .NET framework and an ASP.NET Core web app built with .NET 5.
We’re using the .NET Standard 2.0 version for the data model class library because it has a broad “API surface” that .NET 4.8 and .NET 5 projects can reference.

- Create a new .NET Standard 2.0 project named SampleModel.csproj.
- Create a new class file named CartItem.cs.
- Now add the following code:
					using System;

namespace SampleModel
{
  [Serializable]
  public class CartItem
  {
    public CartItem()
    {

    }

    public CartItem(int productId, string description, decimal unitPrice, int quantity)
    {
      ProductId = productId;
      Description = description;
      UnitPrice = unitPrice;
      Quantity = quantity;
    }

    public int ProductId { get; set; }
    public string Description { get; set; }
    public decimal UnitPrice { get; set; }
    public int Quantity { get; set; }
    public decimal Total { get { return Quantity * UnitPrice; } }
  }
}
Note that the [Serializable] attribute allows the serialization of the CartItem class when Hazelcast stores it in the cluster.
Creating the ASP.NET Web Forms Project
In this section, we create a legacy project using .NET Framework 4.8. It uses a wrapper class to communicate with the cluster using the Hazelcast.NET client package.
Configuring the Project
Follow these steps to configure the project:
- Create a new ASP.NET Web Forms project named
SampleLegacy. - Open the project’s properties and select .NET Framework 4.8.
- Right-click the project name, point to Add, and click Project Reference.
- Now select the
SampleModelproject. - Right-click the project name, then click Manage NuGet Packages and install the Hazelcast.Net 5.0 package. This action allows us to import the Hazelcast client and connect to a Hazelcast cluster in this web app.
Defining the Wrapper Class for the Hazelcast Client
Create a new ECommerceDataHazelCast.cs file in the project root folder. Then add the following code:
					using Hazelcast;
using Hazelcast.DistributedObjects;
using System;
using System.Collections.Generic;
using System.Diagnostics;
using System.Linq;
using System.Threading.Tasks;
using SampleModel;

namespace SampleLegacy
{
  public interface IECommerceDataHazelCast
  {
    Task InitializeAsync();
    Task<List<CartItem>> GetCartItemsAsync();
    Task AddCartItemAsync(int productId, string description, decimal unitPrice, int quantity);
    Task ShutdownAsync();
  }

  public class ECommerceDataHazelCast : IECommerceDataHazelCast
  {
    private IHMap<int, CartItem> cartItemsMap;

    private static ECommerceDataHazelCast instance;
    public static ECommerceDataHazelCast Instance
    {
      get
      {
        if (instance == null)
        {
          instance = new ECommerceDataHazelCast();
        }

        return instance;
      }
    }

    private ECommerceDataHazelCast()
    {

    }

    private IHazelcastClient hazelcastClient { get; set; }

    public async Task InitializeAsync()
    {
      StartAsync();

      // Get the Distributed Map from Cluster.
      cartItemsMap = await hazelcastClient.GetMapAsync<int, CartItem>("distributed-cartitem-map");
    }

    private void StartAsync()
    {
      var options = new HazelcastOptions();
      // create an Hazelcast client and connect to a server running on localhost
      hazelcastClient = HazelcastClientFactory.StartNewClientAsync(options).Result;
    }

    public async Task ShutdownAsync()
    {
      // destroy the map
      await hazelcastClient.DestroyAsync(cartItemsMap);
    }

    public async Task<List<CartItem>> GetCartItemsAsync()
    {
      return (await cartItemsMap.GetValuesAsync()).ToList();
    }

    public async Task AddCartItemAsync(int productId, string description, decimal unitPrice, int quantity)
    {
      var newItem = new CartItem(productId, description, unitPrice, quantity);
      await cartItemsMap.PutAsync(newItem.ProductId, newItem);
    }
  }
}
This wrapper has only four methods:
InitializeAsynccallsStartNewClientAsynconHazelcastClientFactoryto start a new client and initializes the map for the shopping carts.ShutdownAsyncdestroys theHazelcastclient.GetCartItemsAsynccalls theGetValuesAsyncmethod to get the values from the shopping cart items map as a list.AddCartItemAsynccalls thePutAsyncmethod on the shopping cart items map to insert or update a shopping cart item.
Configuring the Web App to Use Hazelcast
Add these two methods to the Global.asax.cs file:
					public class Global : HttpApplication
{
  void Application_Start(object sender, EventArgs e)
  {
    // Code that runs on application startup
    RouteConfig.RegisterRoutes(RouteTable.Routes);
    BundleConfig.RegisterBundles(BundleTable.Bundles);

    ECommerceDataHazelCast.Instance.InitializeAsync().Wait();
  }

  void Application_End(object sender, EventArgs e)
  {
    ECommerceDataHazelCast.Instance.ShutdownAsync().Wait();
  }
}
Building the Shopping Cart Web Page
Now let’s add an introductory page to this web application that can write to and read from a Hazelcast Map. Replace the contents of the Default.aspx file with the following code block:
					<%@ Page Async="true" Title="Shopping Cart" Language="C#" MasterPageFile="~/Site.Master" AutoEventWireup="true" CodeBehind="Default.aspx.cs" Inherits="SampleLegacy._Default" %>

<asp:Content ID="BodyContent" ContentPlaceHolderID="MainContent" runat="server">

  <h3>
    SHOPPING CART
  </h3>

  <asp:Repeater ID="cartItemsRepeater" runat="server">

  <HeaderTemplate>
    <table id="cartItemsTable" class="table">
    <thead>
      <tr>
        <th>Qty</th>
        <th>Description</th>
        <th>Unit Price</th>
        <th>Total</th>
      </tr>
    </thead>
  </HeaderTemplate>

  <ItemTemplate>
    <tr>
      <td><%# Eval("Quantity") %></td>
      <td><%# Eval("Description") %></td>
      <td><%# Eval("UnitPrice") %></td>
      <td><%# Eval("Total") %></td>
    </tr>
  </ItemTemplate>

  <FooterTemplate>
    </table>
  </FooterTemplate>
  </asp:Repeater>

  <form method="POST">
    <div class="row">
      <div class="col">
        <asp:Button runat="server" ID="addOrange" Text="Add Orange" OnClick="addItem_Click" />
        <asp:Button runat="server" ID="addCoconut" Text="Add Coconut" OnClick="addItem_Click" />
        <asp:Button runat="server" ID="addApple" Text="Add Apple" OnClick="addItem_Click" />
        <asp:Button runat="server" ID="addGrapefruit" Text="Add Grapefruit" OnClick="addItem_Click" />
      </div>
    </div>
  </form>

</asp:Content>
Hazelcast map storing the shopping cart items:
					using System;
using System.Threading.Tasks;
using System.Web.UI;
using System.Web.UI.WebControls;

namespace SampleLegacy
{
  public partial class _Default : Page
  {
    protected void Page_Load(object sender, EventArgs e)
    {
      RegisterAsyncTask(new PageAsyncTask(GetCartItemsAsync));
    }

    private async Task GetCartItemsAsync()
    {
      var cartItems = await ECommerceDataHazelCast.Instance.GetCartItemsAsync();
      cartItemsRepeater.DataSource = cartItems;
      cartItemsRepeater.DataBind();
    }

    protected void addItem_Click(object sender, EventArgs e)
    {
      RegisterAsyncTask(new PageAsyncTask(async (t) =>
      {
        switch (((Button)sender).ClientID)
        {
          case "MainContent_addOrange":
            await ECommerceDataHazelCast.Instance.AddCartItemAsync(1, "Orange", 1.50m, 1);
            break;
          case "MainContent_addCoconut":
            await ECommerceDataHazelCast.Instance.AddCartItemAsync(2, "Coconut", 2.50m, 1);
            break;
          case "MainContent_addApple":
            await ECommerceDataHazelCast.Instance.AddCartItemAsync(3, "Apple", 1.00m, 1);
            break;
          case "MainContent_addGrapefruit":
            await ECommerceDataHazelCast.Instance.AddCartItemAsync(4, "Grapefruit", 2.0m, 1);
            break;
          default:
            break;
        }
      }));
      RegisterAsyncTask(new PageAsyncTask(GetCartItemsAsync));
    }

  }
}
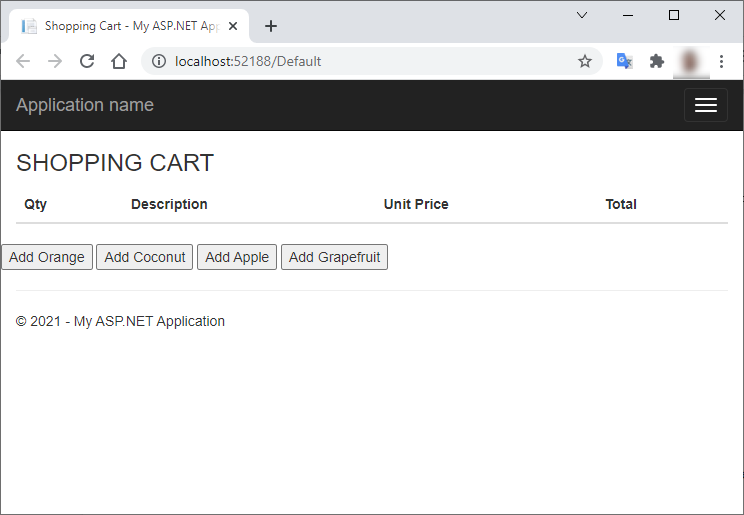
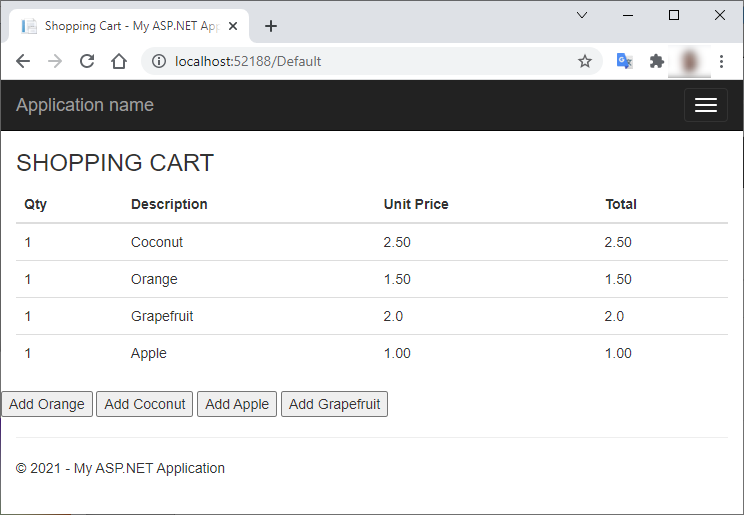
Finally, run the application to see it display the shopping cart view on the home page:
Click the Add Orange and Add Apple buttons to display these items in the shopping cart.
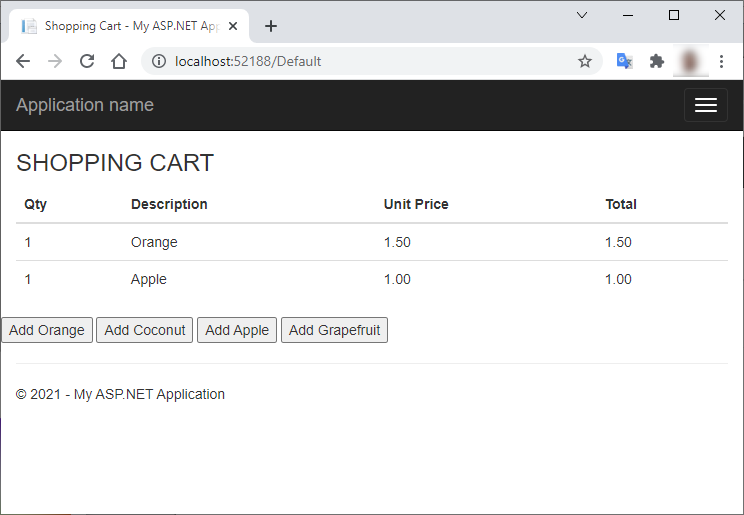
Now click the other product buttons many times. You will see that each product only appears once in the shopping cart.
Creating the ASP.NET Core Project
Now we create a modernized version of the previous legacy project using ASP.NET Core Razor pages.Configuring the Project
Follow these steps to configure the project:- Create a new ASP.NET Web Forms project named SampleNetCore.csproj and save it in a new solution called SampleNetCore.sln.
- Include the same
SampleModelproject that you created before in the new solution. - Right-click the project name, point to Add, and click Project Reference. Then select the SampleModel project.
- Right-click the project name, select the NuGet Packages window, and install the Hazelcast.Net 5.0 package. This action allows us to import the
Hazelcastclient and connect to aHazelcastcluster in this web app. - Open the SampleNetCore.csproj file to include the
EnableUnsafeBinaryFormatterSerializationproperty and set it to True.
					<PropertyGroup>
  <TargetFramework>net5.0</TargetFramework>
  <EnableUnsafeBinaryFormatterSerialization>true</EnableUnsafeBinaryFormatterSerialization>
</PropertyGroup>
Defining the Wrapper Class for the Hazelcast Client
Copy the ECommerceDataHazelCast.cs file from SampleLegacy to the new SampleNetCore project. Then remove the following code block:
					private static ECommerceDataHazelCast instance;
public static ECommerceDataHazelCast Instance
{
  get
  {
    if (instance == null)
    {
      instance = new ECommerceDataHazelCast();
    }

    return instance;
  }
}

private ECommerceDataHazelCast()
{

}
Configuring the Web App to Use Hazelcast
Open the Program.cs file and add these two methods to the Program class:
					public static async Task Main(string[] args)
{
  var webHost = CreateHostBuilder(args).Build();
  await SetupHazelCast(webHost);
  webHost.Run();
}

private static async Task SetupHazelCast(IHost webHost)
{
  await webHost.Services.GetRequiredService<IECommerceDataHazelCast>().InitializeAsync();
}
Then add this using method to Program.cs:
using Microsoft.Extensions.DependencyInjection;
Open the Startup.cs file and add this line to the ConfigureServices method:
services.AddSingleton<IECommerceDataHazelCast, ECommerceDataHazelCast>();
Then modify the Configure method to include the IHostApplicationLifetime parameter:
public void Configure(IApplicationBuilder app, IWebHostEnvironment env, IHostApplicationLifetime hostApplicationLifetime)
Configure method:
					hostApplicationLifetime.ApplicationStopping.Register(() =>
{
  using (var scope = app.ApplicationServices.GetRequiredService<IServiceScopeFactory>().CreateScope())
  {
    var eCommerceDataHazelCast = scope.ServiceProvider.GetService<IECommerceDataHazelCast>();
    eCommerceDataHazelCast.ShutdownAsync().Wait();
  }
});
Building the Shopping Cart Web Page
Now let’s add an introductory page to this web application that can write to and read from a Hazelcast Map. Replace the contents of the Index.cshtml file with the following code block:
					@page
@using SampleModel
@model SampleNetCore.Pages.IndexModel
@{ ViewData["Title"] = "Shopping Cart"; }

<h3>
  SHOPPING CART
</h3>

<table class="table">
  <thead>
    <tr>
      <th>Qty</th>
      <th>Description</th>
      <th>Unit Price</th>
      <th>Total</th>
    </tr>
  </thead>
  <tbody>
    @foreach (var cartItem in Model.CartItems)
    {
    <tr>
      <td>@cartItem.Quantity</td>
      <td>@cartItem.Description</td>
      <td>@cartItem.UnitPrice</td>
      <td>@cartItem.Total</td>
    </tr>
    }
  </tbody>
</table>

<form method="POST">
  <div class="row">
    <div class="col">
      <input type="submit" name="addOrange" value="Add Orange" />
      <input type="submit" name="addCoconut" value="Add Coconut" />
      <input type="submit" name="addApple" value="Add Apple" />
      <input type="submit" name="addGrapefruit" value="Add Grapefruit" />
    </div>
  </div>
</form>
Replace the contents of the Index.cshtml.cs file with the following code block:
					using Microsoft.AspNetCore.Mvc;
using Microsoft.AspNetCore.Mvc.RazorPages;
using Microsoft.Extensions.Logging;
using SampleModel;
using System.Collections.Generic;
using System.Threading.Tasks;

namespace SampleNetCore.Pages
{
  public class IndexModel : PageModel
  {
    private readonly ILogger<IndexModel> logger;
    private readonly IECommerceDataHazelCast eCommerceData;

    public IndexModel(ILogger<IndexModel> logger, IECommerceDataHazelCast eCommerceData)
    {
      this.logger = logger;
      this.eCommerceData = eCommerceData;
    }

    public List<CartItem> CartItems { get; private set; }

    [BindProperty]
    public string addOrange { get; set; }
    [BindProperty]
    public string addCoconut { get; set; }
    [BindProperty]
    public string addApple { get; set; }
    [BindProperty]
    public string addGrapefruit { get; set; }

    [BindProperty]
    public string checkoutSubmit { get; set; }

    public async Task OnGetAsync()
    {
      await InitializePageAsync();
    }

    private async Task InitializePageAsync()
    {
      this.CartItems = await eCommerceData.GetCartItemsAsync();
    }

    public async Task<IActionResult> OnPostAsync()
    {
      if (!ModelState.IsValid)
      {
        return Page();
      }

      if (!string.IsNullOrWhiteSpace(addOrange))
      {
        await eCommerceData.AddCartItemAsync(1, "Orange", 1.50m, 1);
      }
      if (!string.IsNullOrWhiteSpace(addCoconut))
      {
        await eCommerceData.AddCartItemAsync(2, "Coconut", 2.50m, 1);
      }
      if (!string.IsNullOrWhiteSpace(addApple))
      {
        await eCommerceData.AddCartItemAsync(3, "Apple", 1.00m, 1);
      }
      if (!string.IsNullOrWhiteSpace(addGrapefruit))
      {
        await eCommerceData.AddCartItemAsync(4, "Grapefruit", 2.0m, 1);
      }

      await InitializePageAsync();
      return Page();
    }
  }
}
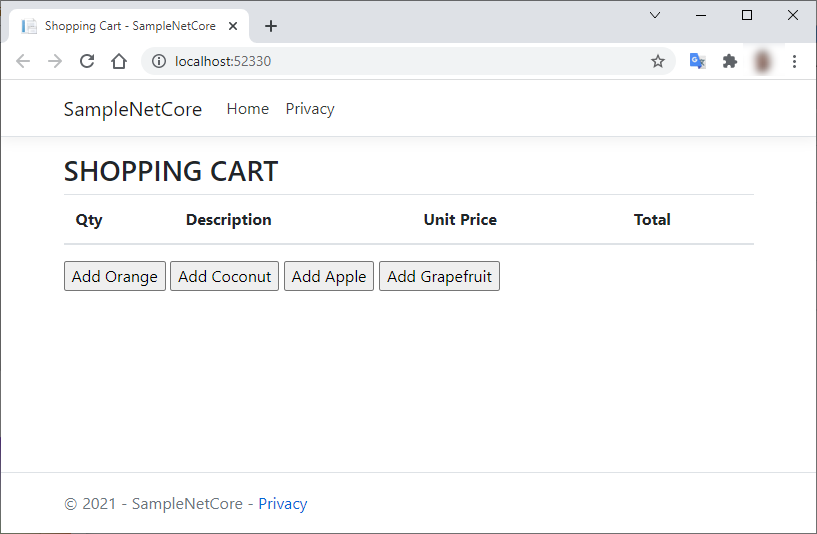
Run the application to see the shopping cart view.
Click the Add Orange and Add Apple buttons to see the app add these items to the shopping cart.
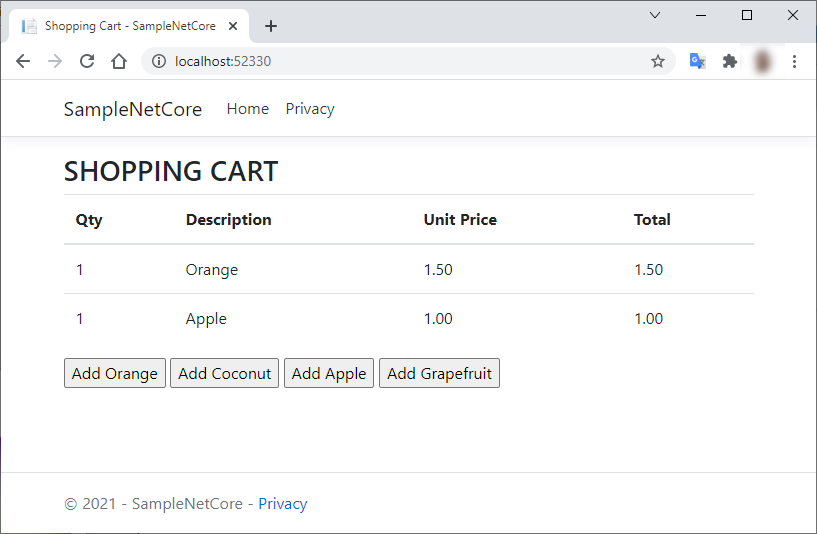
Now click the other product buttons many times. You see that each product only appears once in the shopping cart.
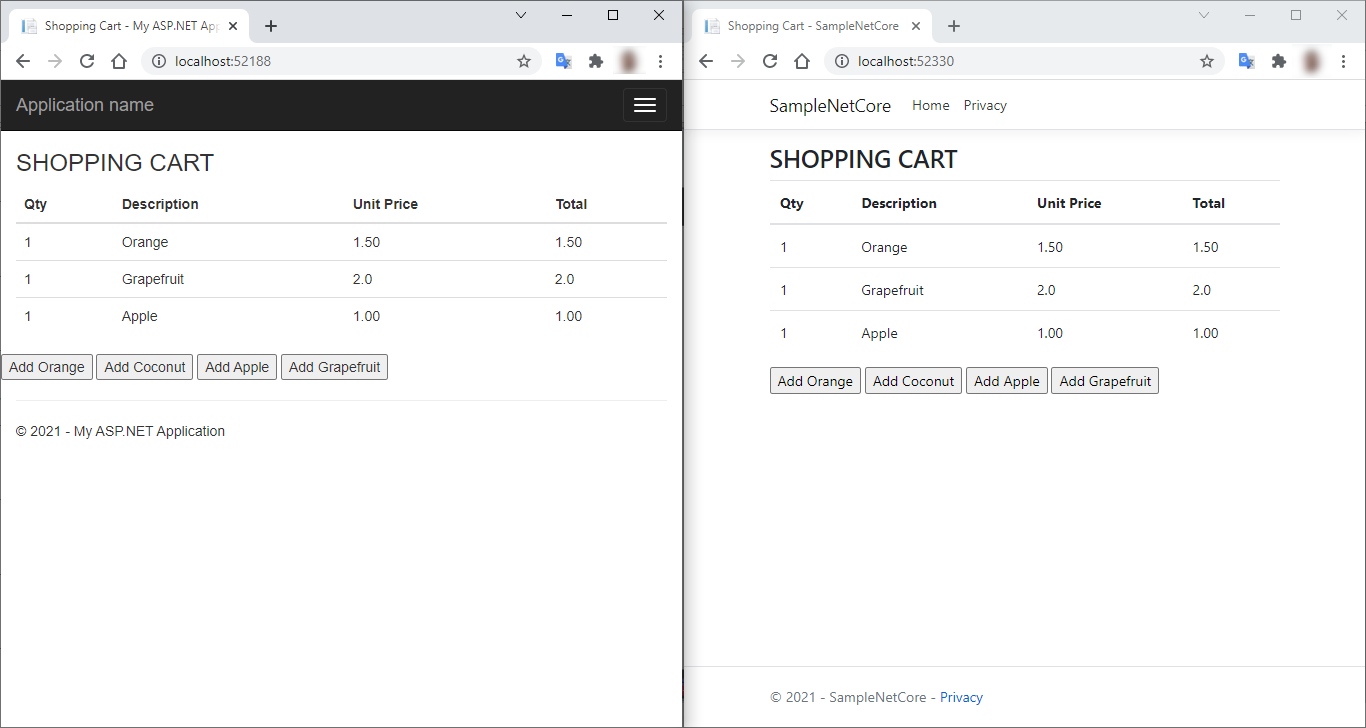
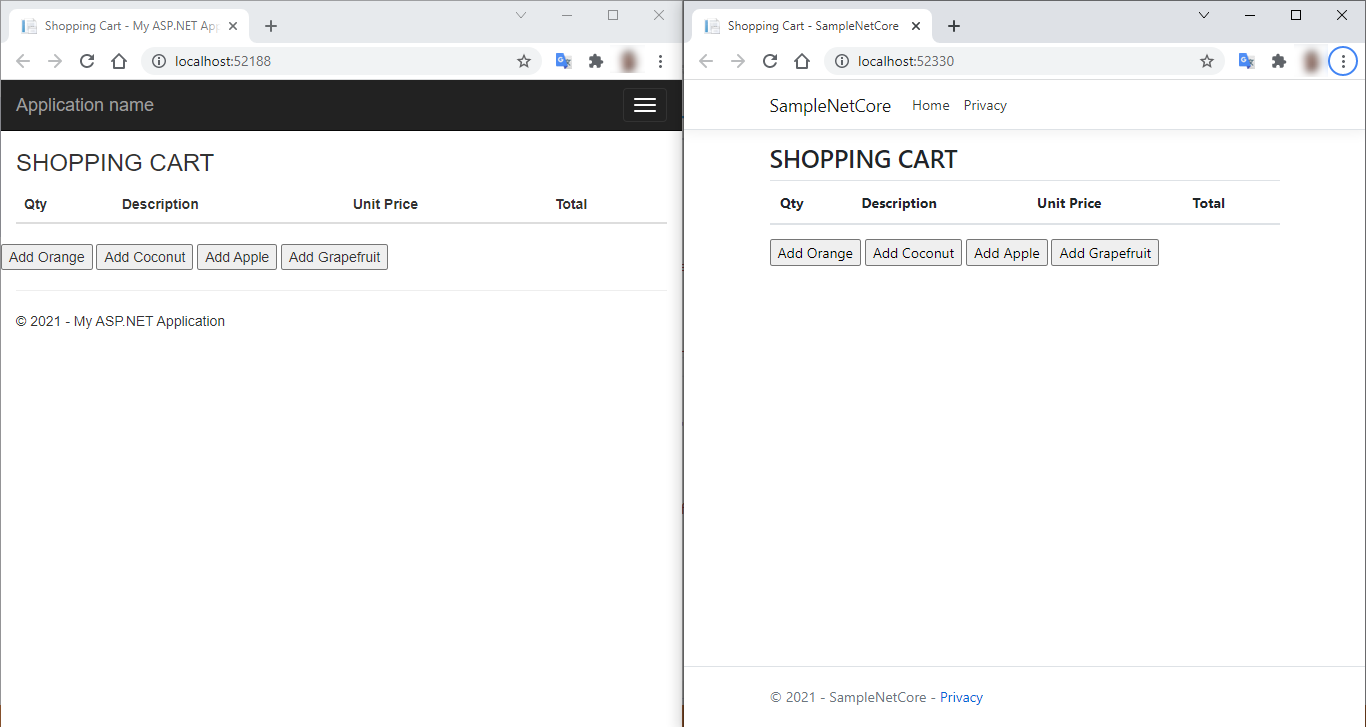
Running Both Projects Side-by-Side
Restart your Hazelcast cluster and run both the legacy and the ASP.NET Core project side-by-side. Initially, both shopping carts appear empty.
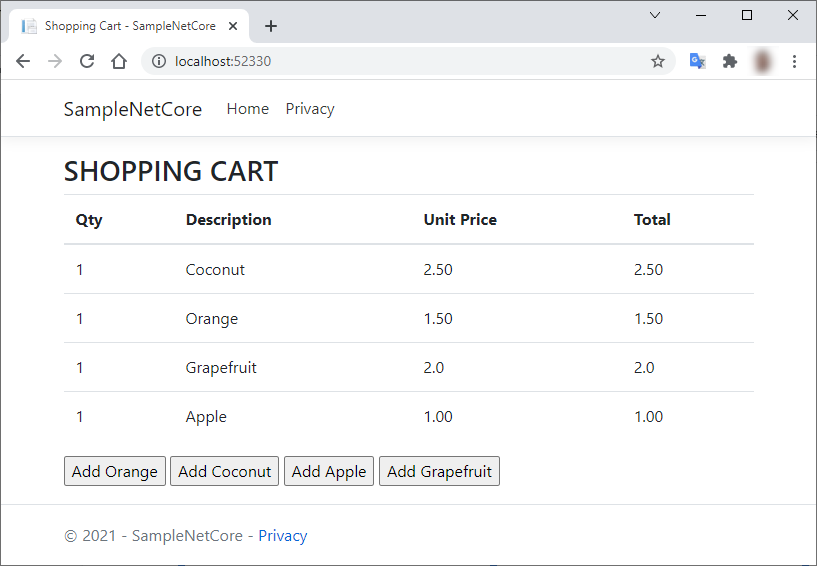
Now click one button on the legacy web app to add one item. Then refresh the other browser tab to see how the ASP.NET Core reflects that change.
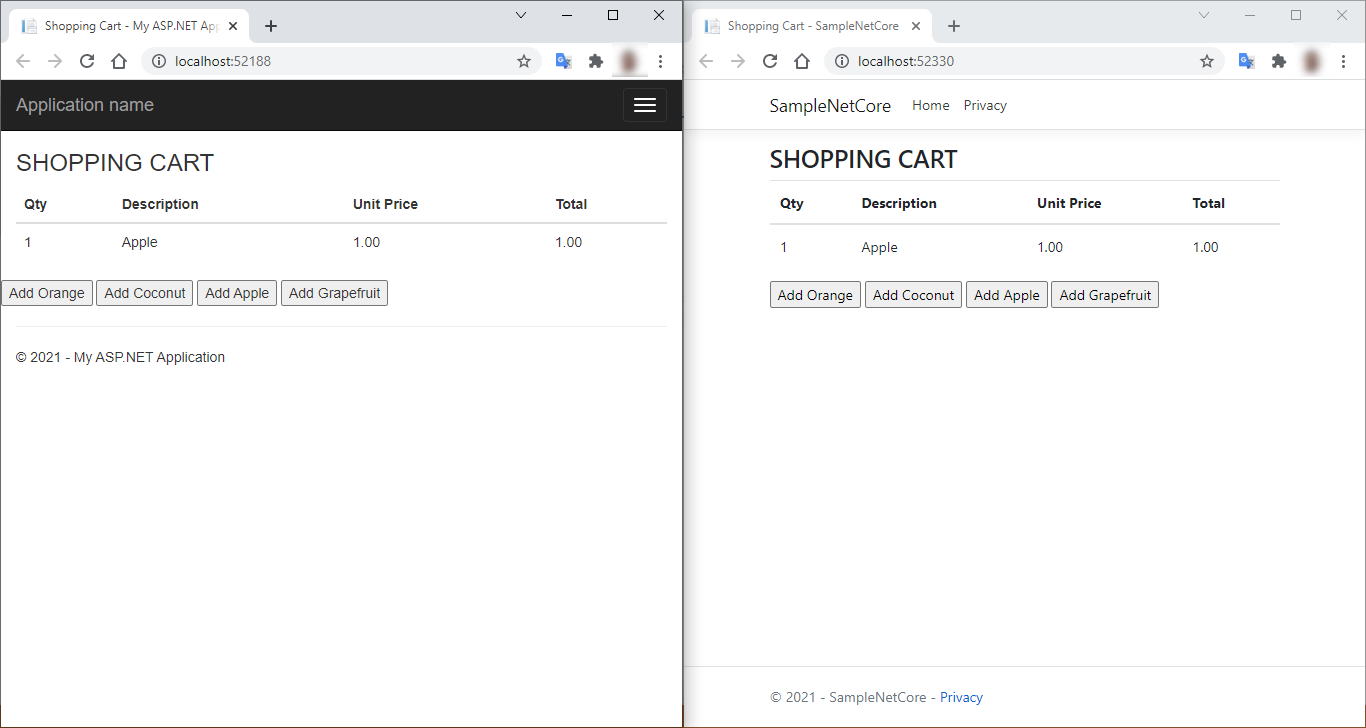
This time, click the ASP.NET Core web app to add new items. Then refresh the legacy website to see the changes.