In this article, we explore how to apply security policies on the fly based on the user’s browser. We look at how the OneLogin Pre-Authentication Hook makes this possible.
Before we do that, let’s discuss what Smart Hooks are and what they can do for you. A Smart Hook is “an extension point in OneLogin” code that lets you define customized actions using JavaScript. OneLogin hosts serverless JavaScript code that executes when certain events occur.
At the time of writing, OneLogin has two Smart Hooks:
- The Pre-Authentication Hook, which allows for the adaptation of flows and policies before authenticating. The developer adapts the flow based on environmental variables.
- The User Migration Hook, which allows for the migration of users to OneLogin. At login time this hook migrates the future OneLogin user’s details to ease administrative tasks.
In this article, we use the Pre-Authentication Hook.
Here’s how it works: The user interface passes a context to the hook. This context contains information about the user and the location. The Pre-Authentication Hook provides a great way to query that information. From there, we can establish rules of access according to the user’s situation.
For a Pre-Authentication Hook, this makes complete sense. It’s too late to determine whether stricter authorization is necessary after authentication. There’s no need for multi-factor authentication within the company intranet. Authenticating from an Internet cafe’s free WiFi is a different story. The same questions arise when using the latest version of your browser.
To find out how to use this hook, we’re going to build a small Node.js application. It’s not a very functional application but makes the calls necessary to test whether the Pre-Authentication Hook is working. The code is available on GitHub here.
Getting Started
Before we get down to business, we need to set up a developer account on OneLogin. It’s simple! Just be aware that the developer account alone isn’t enough to create and execute Smart Hooks. If you don’t have access to a paid account, you’ll need to enable your 30-day free account.
Also, if you don’t already have it, download the Postman application. We’ll use this to look at the OneLogin API mechanism. We won’t do a deep dive on how to use Postman, so you’ll need to have some knowledge of Postman for this tutorial. There are links to Postman documentation at the end of this article to help you out.
It’s a good idea to create another user to test with. A test user gives us someone to apply the tougher policies to.
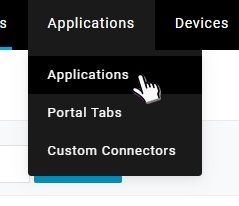
First, we need to set up an application in OneLogin. On your Administration menu, click Applications, then Applications.
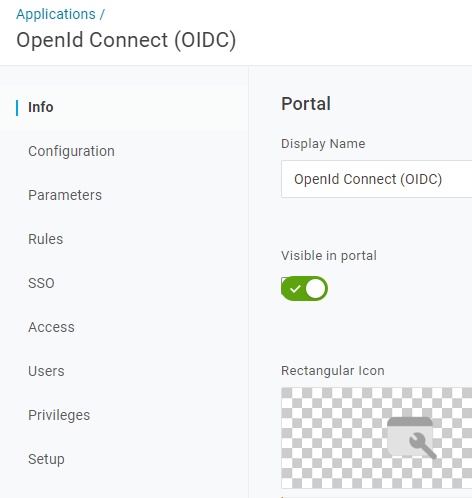
Create a new application, then click through the tabs to see what is important. In our case, the display name is in the Info tab.
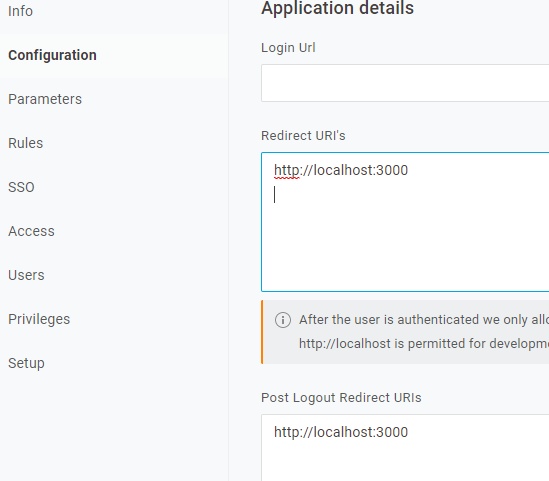
On the Configuration tab, update the Redirect URIs to point you home after your OneLogin interactions.
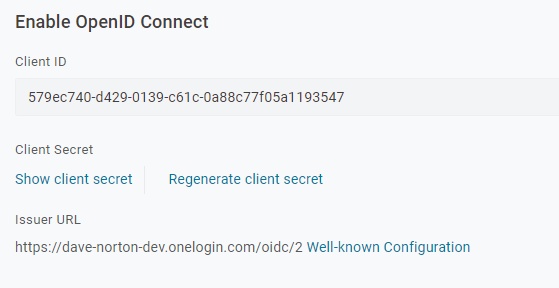
On the SSO tab, take note of the Client ID and the Client Secret. We’ll use them in the Node application.
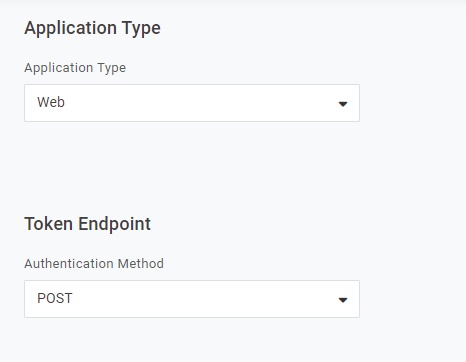
Further down the page, set the Application Type and the Token Endpoint.
Don’t forget to ensure your new user has rights to this application. This is done by adding your new application to the Applications tab of the user profile.
A Look at the API
OneLogin has given us several collections of Postman API tests. One last task before we get into things. Download the Smart Hooks Postman collection from OneLogin. This allows us to try the API before putting it into our code.
Since we’re going to apply different security policies, we need to create policies. We require two policies with one being more restrictive than the other.
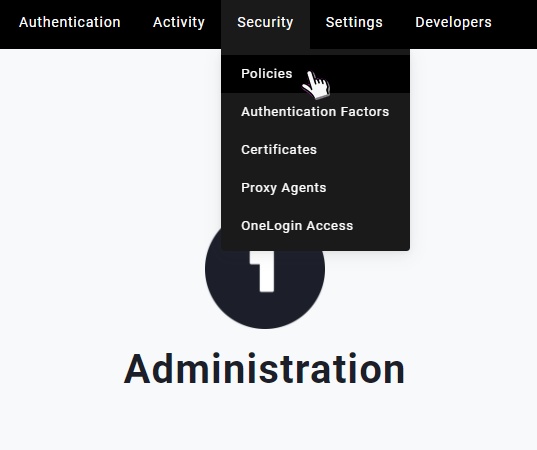
On the OneLogin administration page, click Security then Policies to get to policy administration.
There’s already a user policy. The default policy is relaxed, so we can use this for our less-restrictive policy. Next, we create a more restrictive policy.
Click New User Policy in the top right corner.
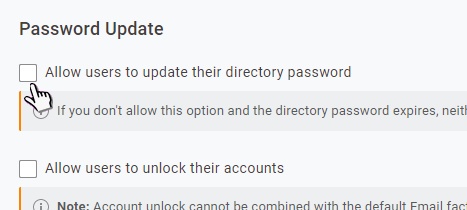
The default options for the Sign in and Password tabs are enough for our needs. The first thing we need to change is in the Account Recovery tab.
Clear the option to Allow users to update their directory password.
These rules don’t meet all needs, but this is only an example of a more restrictive policy.
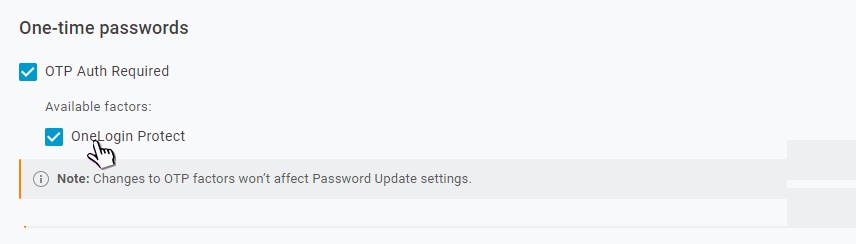
Next, change the session and multi-factor authentication settings.

To enable multi-factor authentication, we need to enable an authentication method. For our purposes, enable OneLogin Protect. OneLogin Project is a free phone app that can be downloaded from your app store.
Give your policy a name.
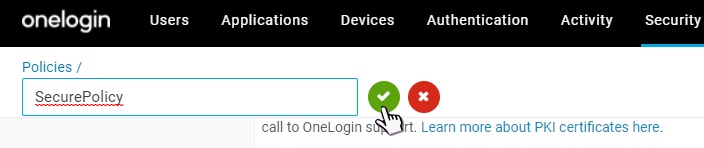
Don’t forget to click Save.
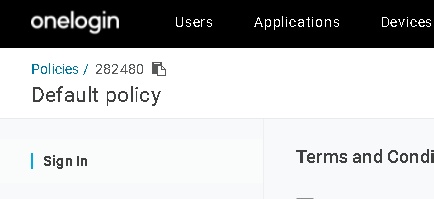
Take note of the policy number in the top left corner, since we’ll use it later.
Now that we have the scaffolding in place, let’s set about creating a Smart Hook. We create the Pre-Authorization Hook using the provided API calls and then change it to suit our needs. OneLogin has again provided us with what we need to get cracking.
Creating a Smart Hook
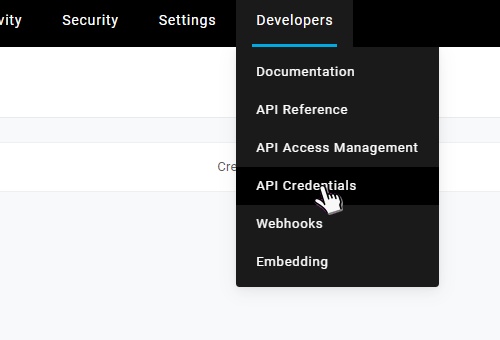
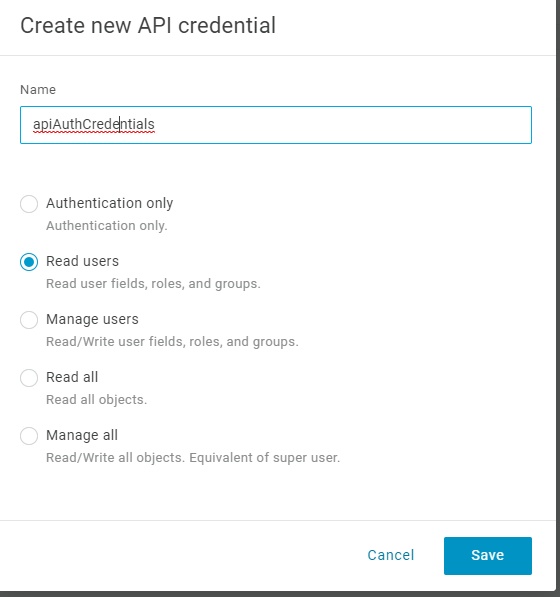
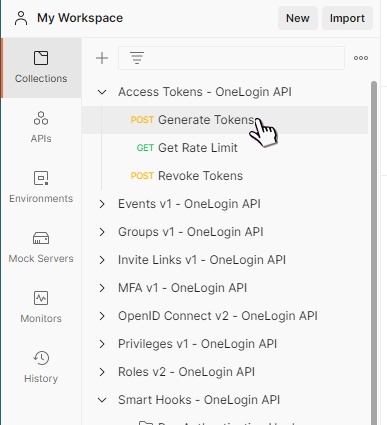
To create the Pre-Authorization Hook, we must pass a bearer token (or access token) to the API. Download the Access Tokens Postman collection to use the API. The Generate Tokens API call creates this bearer token. This call accepts the API credential pair created by the application developer. We create the pair using the API Credentials item on the Developers menu. We start by creating a new credential and choosing the level of authority.
Load the Generate Tokens API in Postman.
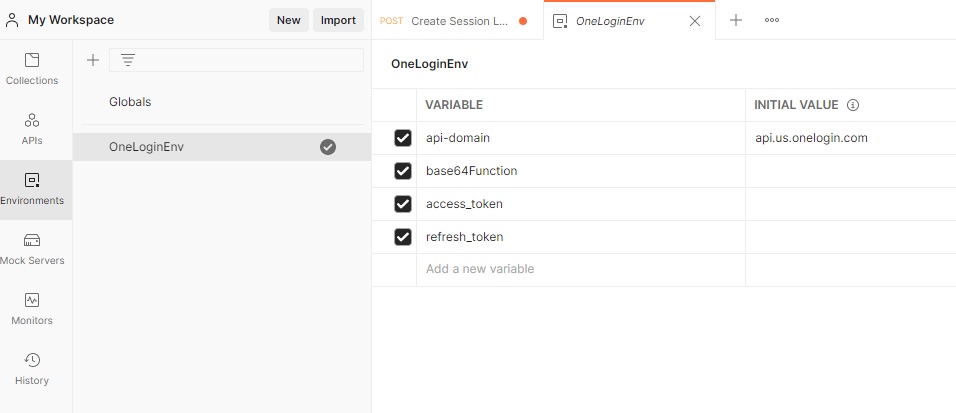
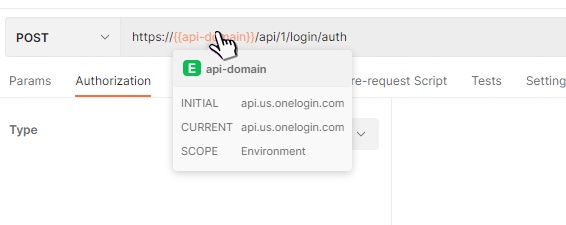
Record the API domain. This is the region in which your account is hosted. All API calls require this.

It saves some typing if you set up an environment variable in Postman.
Click the Environments tab. Then, add the variable as shown in the following screen capture. When Postman finds this variable, it replaces it with the value at runtime.
You can look at the value in the variable by hovering your mouse over the text.
On the Authorization tab, select Basic Auth from the Type drop-down menu. Copy the Client ID and Secret values into the Username and Password fields, then click the Send button.
The resulting window should show the following on the Body tab.
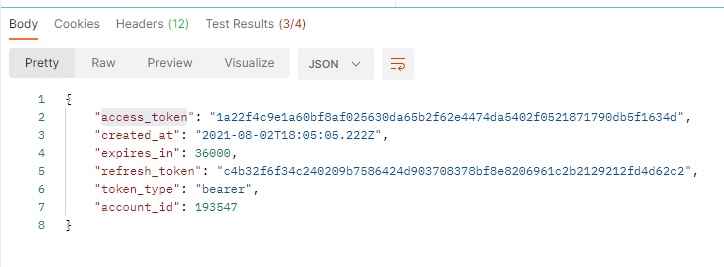
access_token item is what we use to create a Smart Hook.
Next, click Smart Hooks – OneLogin API. Click the API labeled Create Minimum Viable Function. 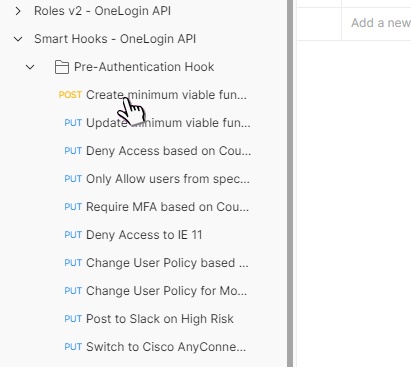
As the name suggests, this API creates a valid but useless function.
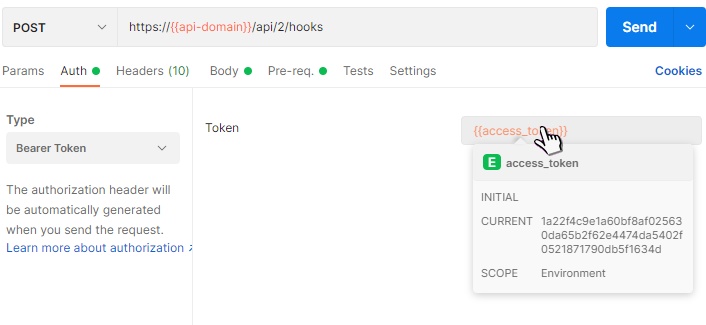
On the Authorization tab, select Bearer Token from the drop-down menu. Copy your access token into the Token. Before doing that, hover your mouse over the access_token field. If you’re in the same session as when running the Generate Tokens API, the value is already there.
Click Send to create the Pre-Authorization Hook and take note of the returned id in the resulting body. Repeat the same procedure. This time load the PUT API called Changing User Policy Based on Browser Type. On the Params tab copy the id from above into the hook_id variable.
On the Pre-Request Script tab look at the function. This function parses the device string and determines the browser type and version. There is a lot more information available. You can find a full description of ua-parser-js here.
It’s possible to determine your policy based on browser type and then drill down into versions and so on. For our purposes, we determine which policy to apply based on the browser type. To have a look at what is available in the user context, look at this article. We apply our security policy if the browser is Chrome, otherwise, we want to use the default policy.
Adjust your function, particularly the switch statement, as follows. Insert your policy numbers as required for testing:
					switch (browser.name) {
    case "Edge":
        user.policy_id = 282480;
        break;
    case "Chrome":
        user.policy_id = 284186;
        break;
    case "Firefox":
        user.policy_id = 282480;
        break;
    case "Safari":
        user.policy_id = 282480;
        break;
    default:
        user.policy_id = 282480;
        Break;
 }
All that remains is for us to test.
Testing the Pre-Authorization Hook
Authentication is enough for our purposes. We need to be able to log in to our app twice: once running in Chrome, and then again running in any other browser. If the Smart Hook is working correctly, when logging in from Chrome, the user will be presented with the second authentication factor. In our example, this is the OneLogin Protect app.
The application uses the implicit flow method of authentication. While the OneLogin documentation suggests the use of the “Auth Code + PKCE” method for single-page applications, implicit flow is sufficient for our purposes. It’s simple and produces the desired results for this test. The simplicity of implicit flow allows us to strip out all the extras, leaving the leanest code required for demonstrating the redirection to the OneLogin login dialog. The same final result can be obtained by ignoring the application and simply logging on to your OneLogin Portal. If the Smart Hook fires in the app login, it will fire in the portal login too.
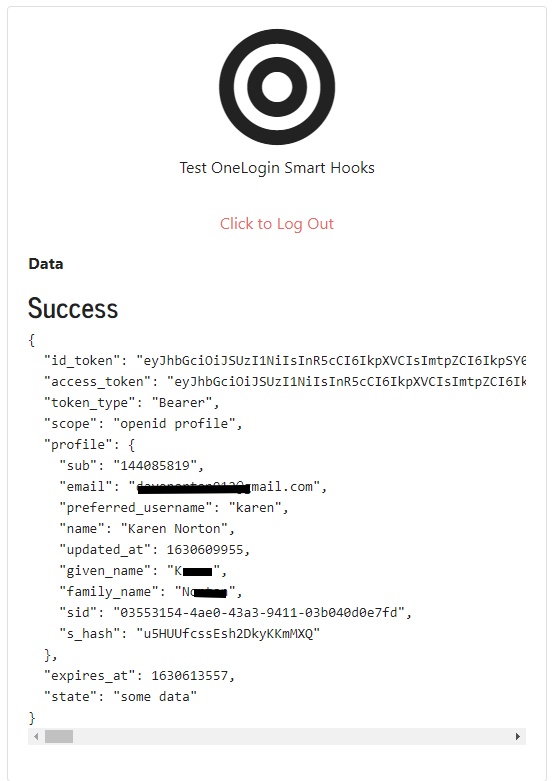
After successful authentication, we display the returned user object in a div. We then create an anchor tag from the user object and the link presented to log out again.
The application is simple Node and JavaScript. Follow the instructions in the README.md to install and run it.
Starting the app presents the user with the following landing page:
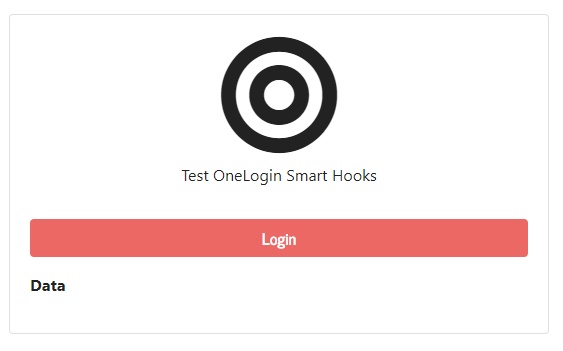
After clicking Login, you’re redirected to the OneLogin login page.
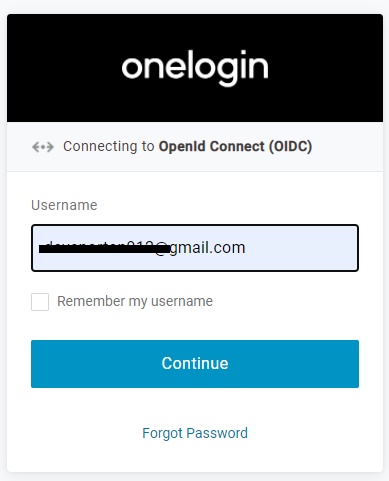
This is where the magic happens. Clicking Continue sends the user name (and context) to the serverless Smart Hook code. The Smart Hook then decides what login policy it should apply.
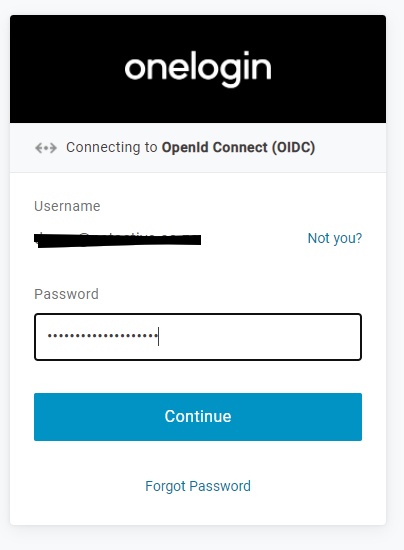
The password is then prompted for and submitted.
In our case, if running on Chrome, the user is presented with the following:
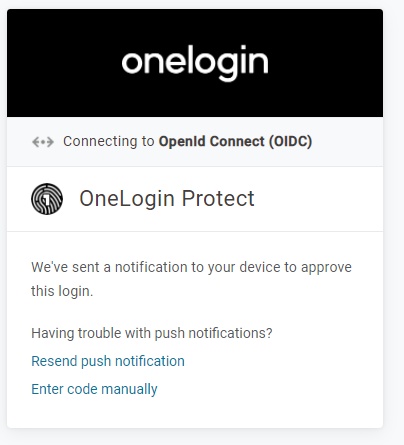
Almost simultaneously, the following is presented on your phone running OneLogin Protect.
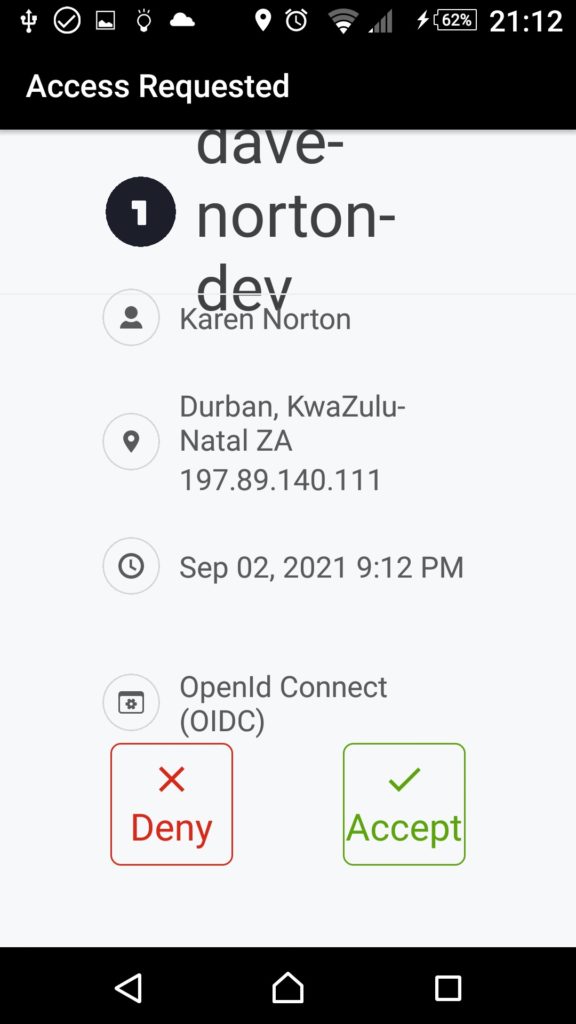
After tapping Accept, your app is redirected back to your registered redirect URI:
We don’t need to go any further than this to test the Pre-Authorization Hook. Execution of the second authentication factor tells us that the Pre-Authorization Hook is working.
Next steps
The OneLogin Pre-Authorization Hook is a large collection of APIs allowing a wide variety of authentication and administration functions. The Pre-Authorization Hook provides a method of adding intelligence at a point where it’s most relevant. As the saying goes, you only get one chance to make a first impression. This is also applicable to authentication. It’s too late to increase the security of your policy after authenticating a user. The policy already believes the correct person has logged on. Applying policies before the authentication process simply makes sense.
Sign up for a OneLogin trial to start using the massive array of well-documented APIs, and download Postman to start looking at the “nuts and bolts” of the OneLogin Smart Hooks. It’s the easiest way of looking at what your calls to APIs are doing.
Links
- Application project on GitHub.
- Postman Learning Center
- OneLogin API Reference
- OneLogin Quickstart
If you’re interested in developing expert technical content that performs, let’s have a conversation today.